
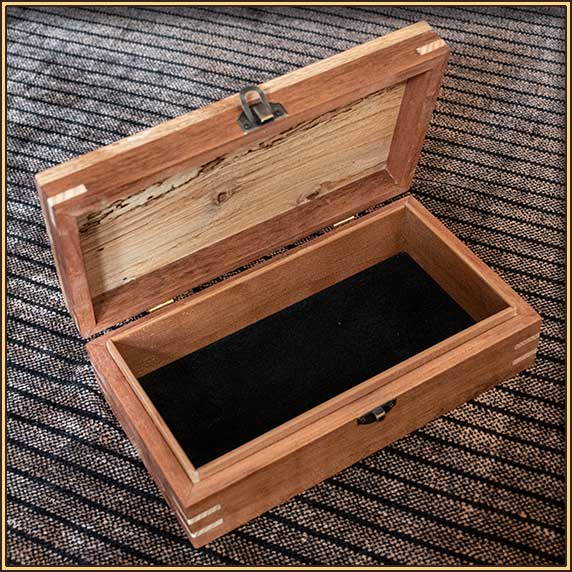
The inside is lined with cedar, and in the bottom is black suede leather.
Dimensions are 240 x 135 x 70 mm.

The inside is lined with cedar, and in the bottom is black suede leather.
Dimensions are 240 x 135 x 70 mm.

What I'm going to keep in it I have no idea, but no doubt something will arise.
It's made out of really terrible cheap 7mm and 9mm plywood that had become badly water-stained at some point, so I decided to paint it rather than staining it as I normally would.
It's large enough for A4 paper in the bottom, and its external dimensions are 345 x 255 x 90 mm.
 |
| Inside |
 |
| Inside the inside |
I included a partitioned tray, about 30mm deep.
The floors are all lined with self-adhesive 1mm thick foam. I had no pieces large enough to cover the whole floor of the box, so I cobbled it together out of pieces of whatever colours I had available.
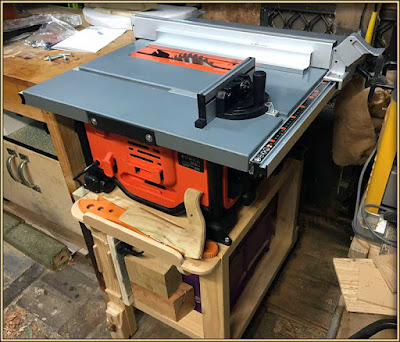 |
| Black & Decker BES720-XE |
My terrible old Ryobi table saw shat itself fatally a few weeks ago, so today I replaced it with this — an 1800w Black & Decker from Mitre10 for a measly $299. (That's all my spending money for the next couple of weeks, but still pretty cheap for a tool like this).
Black & Decker have not really had a very good reputation over the last few decades, but the reviews on this saw are pretty good (for its place in the table saw hierarchy) and the B&D router I got for my birthday more than 20 years ago has run without issue, so maybe the sneers and jibes were all just snobbishness. I dunno.
It has no bells, nor any whistles, but it has good fences and a good cast bed, and it cuts in a straight line. The rip-fence gauge is pretty accurate, according to my initial tests: not sub-millimetre accurate, but certainly good enough for my needs. It has a much deeper bed than the Ryobi did, which will be helpful for getting the initial cut aligned.
The angling of the blade has no screw adjustment; you just have to push it over to the angle you want and lock it off. That will make cutting at precise angles a bit trickier. Also, the mitre sled's reported angle is unreliable, and will need to be set manually with a square or protractor, but to be fair I've almost never encountered a mitre sled that is properly accurate. I have a mitre saw for that sort of thing in any case.
It is much, much better than the saw it replaces, which was never much better than a hand-held circular saw.

It comes with a dust bag that sticks out the back, or you can use a vacuum on the dust ejection port, but I used some 40mm PVC waste pipe and connectors to redirect it into a plastic bin that sits underneath the saw on the trolly I made for my last one. It doesn't capture all of the dust, but certainly takes care of most of it.
The saw blade will not set to 45°, the closest it will come is 46°. I think there is sufficient travel on the bearers to get that crucial last degree, but the dust collection shroud appears to be coming up against the shell of the machine somewhere.
I may be able to ameliorate the issue with a bit of surgery, but this is a major failing of quality control.

I may not be able to get the blade to 45°, but I can get it to 90°. So I whipped up this mitre sled out of scraps of MDF.
It works okay, though it's one more jig I'll have to find somewhere to store.
 |
| Mitre cut successfully |
As it turns out, the backing board on the sled is more of a nuisance than anything, but I can't be bothered disassembling it to take it off now.
After poking around in the guts of the machine, I think I've identified the block point that is preventing the blade tilting right over to 45°. Unfortunately, I can't come at it to try some surgery without disassembling pretty much the whole thing, so there's no easy fix.
I don't know if this is a design flaw integral to the model in general, or whether I just got a lemon. I've contacted Black & Decker NZ about it, but whether anything concrete will come of that I have no idea. I guess for the moment I'll just have to wait and see.
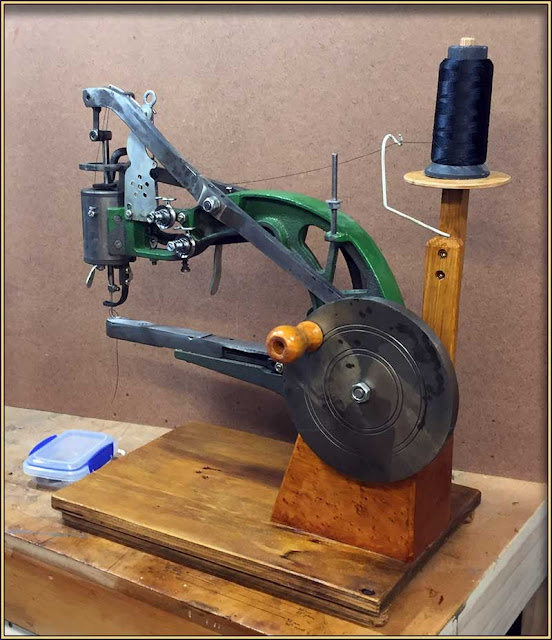
I mounted it on a wooden base a while ago, and now I've shellacked it so it's all smooth and shiny.
I added a wire thread guide to the spool stand — at the moment it's just held in place with superglue, and at some stage it will probably need some support at its base to keep it from twisting. Maybe not though; it's not as if it's ever under much strain.
I added a base to the small spool stand; just a nut and washer, again stuck in place with superglue. Without those, the cotton spool would just fall wonkily on to the cast frame, and would not turn freely as the thread is drawn out.
Finally (so far) I replaced the fairly terrible little plastic crank handle with a more substantial one that I turned down from a scrap of pine. Hopefully that should make turning the crank a bit easier.
The manufacturing quality of these machines is not high, but it does work. No doubt there's a lot more fettling that could be done, but we shall just have to see.