Thursday, November 21, 2024

Wakizashi Bokken


I made myself a wakizashi-size bokken, to go along with my regular katana-size bokken. It will be of extremely limited usefulness, but never mind, it was something to do.

The scrap of oak I used was less than optimal, with very coarse open twisty grain. I doubt that it would survive very much bashing, but I don't foresee it ever being likely to have to. I think that if it came to it, I would be best off to just remake it, using a decent piece of wood.

It is 540mm long, and has been ebonized with iron acetate.

Wednesday, November 20, 2024

Spike-Plate Plate


I made myself a spike-plate* for my lathe, using one of my faceplates, and tried it out by turning this little macrocarpa plate. It's small, only 165mm in diameter.

I was aware of the knot before I started turning it, but not of the splits that run almost the whole way across it. It's purely luck that it held together on the lathe long enough to finish.

* (A spike-plate is just a disc with some spikes in it, like a carving dish, used to temporarily mount a thin piece of wood to the lathe. The tail-stock holds the piece against the spike-plate and allows me to cut a tenon for a more secure mounting.)

Monday, November 18, 2024

Tanto


Wooden training tanto, a commission for a friend.

Rimu, 290 mm.

Friday, November 15, 2024

Parting Tool


I have an old blade off my old table saw, on which are several chipped or broken teeth. It's not much use as a saw blade any more for that reason, but I could extract some use from it by chopping out a bar with one good tooth, and mounting it in a handle for use as a thin parting tool for the lathe.

This will give me a kerf of a bit less than 3mm, compared with about 6mm for any of my other parting tools. The carbide tooth should last for a good long time too, but if need be I can still resharpen it with a diamond hone.

Wednesday, November 13, 2024

Little Oak Bowls


I'm making a batch of small oak bowls, about 90mm diameter, for no particular reason except that I had no other immediate purpose for the bit of wood. I have ten blanks, so six more to go. I guess they'd be nut bowls, or something like that.

The oak is very, very dry, and rather brittle. That means it chips out very easily, and I'm having to experiment with ways and means to get around that. It's been most apparent when cutting the foot and tenon. The most successful method so far seems to be to cut all the edges with the point of a skew, severing the fibres before moving on to other tools like scrapers.


The first one I did is at the top of the photo, and they progress clockwise. I'm hopeful that by the time I get to the tenth one, I might get a halfway decent result.

Sunday, November 10, 2024

Organiser


 Messing about in the workshop today, I whipped up this little desktop note-taking organiser from a few scraps of rimu.

I do like making things, even simple little things like this.

Saturday, November 9, 2024

Scraper for the lathe


I made myself a scraper from an old ½" square file. It's down to about 9.5mm square now, after grinding off all the teeth.

In truth, it's not the ideal steel for this purpose, as the burr is very fragile and doesn't last long. But it has the benefit of being available, and it will do the job, though at the cost of more frequent sharpening.

The handle is just a bit of pine cut down from a bit of framing timber, and there's a honking great knot half way along its length. Because of that I've left it a little bit thicker than I'd prefer. It'll probably be fine.

Friday, November 1, 2024

Laundry Shelf


I've put up a wide shelf high up in our laundry, in an attempt to fight off — or redirect — the Creeping Cruft a bit.

It's not exactly fine joinery, but I'm happy enough with it considering how badly the pine boards were cupped and winded.

Even a simple job like this is ten times more difficult single-handed, and having increasingly decrepit limbs is not helpful.

Wednesday, October 30, 2024

Tuber-head


This is a drawing I did back in 2010, at Winter Weekend.

It's watercolour and indian ink, drawn with a croquil nib. It's about A4.

Regrettably, I have lost the sketchbook I drew this in. It's a great shame, because it was a really good sketchbook. I've looked and looked, but I just can't find it. It's a complete mystery to me.

Friday, October 18, 2024

Keyboard Hooks

Hook deployed
Keyboard in place
Hook folded up out of the way

I usually have my keyboard propped up against my monitor stand when I'm working with my graphics tablet, but it has a habit of sliding back down again.

So I whipped up a pair of folding hooks that will hold it securely in place, and which I can fold up out of the way when they're not in use.

The hooks hold the keyboard at such an angle that I can still use it fairly easily, but it stays out of the way of my tablet.

Saturday, October 12, 2024

Paint Tube Squeezer Thingamajig


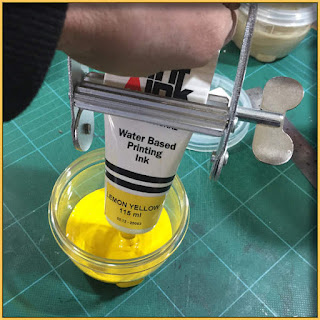
I don't know what the formal name for this thing is, but it's used to squeeze ink or paint out of a tube by squooshing it between the ribbed rollers by means of the key to the side.

This is a very cheap version of the device, and if you really feel like it you can spend quite a bit of cash to get a somewhat better engineered version which does pretty much exactly the same thing.


I prefer to decant my printing ink from its tubes into small screw-topped pots so I can get at it with palette knives. It's more convenient, and also generally less messy.

However, those steel grips are not very comfortable to use. Not very comfortable at all. So I added some grips to make them easier to squeeze.


Oak grips

3d printed grips

I did it in two ways.

I made a pair of grips from a small piece of oak. It took about ten minutes.

I designed a pair of grips in Blender and 3d printed them on my Ender 3. All up, that took about two hours.

The 3d-printed grips are more geometrically exact, but that's about their only benefit over the wooden ones.

Sometimes the high-tech solution isn't the best one.

Friday, October 4, 2024

Thursday, October 3, 2024

Tiny Tenon Turning Made Easy


There are dedicated tools available for the woodturner to enable the precise sizing of tenons. They're not cheap.

Or, if you're more ambidextrous than I am, you can get decent results with a caliper in one hand and a turning tool in the other.

However, I've found that for easy, repeatable tenons in small sizes, such as for drawer pulls and the like, a simple spanner does the job.

I grind an edge on the nose of one arm, at about 45° - 50°, and leave the other blunt. In fact it would probably be a good idea to polish the nose of the other arm, maybe.

Note that in this photo I've sharpened the wrong arm, as discussed below, though in truth it's not that critical.


I bring the blunt nose on the bottom side of the work into contact and then ease the sharp nose in, all the while bearing up on the bottom to keep it in contact.

When the mouth of the spanner slides in around the tenon, you've finished cutting, and you'll have a tenon exactly the same diameter as the size of the spanner.

The way that spanner heads are angled, one arm is canted forward and looks slightly longer than the other (I think this is just an optical illusion, but I'm not sure). This should really be the bottom blunt arm as it makes it easier to address the tool to the work.

Individual spanners are pretty cheap, and are generally made of decent quality steel — though not tool steel, of course. There's no reason why you couldn't have a whole range of spanners sharpened for cutting a range of tenon sizes.

The edge is not going to be a fine cutting edge, and it won't stay very sharp forever, but you can keep resharpening it as long as the length of the cutting arm is greater than the radius of the tenon. Just be sure, when sharpening, to keep the edge square to the length of the spanner; if it is angled, you won't get a square cut.

The only real issue I've found is with small spanners, say 6 to 8 mm, and that is that they're, well, small. Or rather, short. That can make them a bit more difficult to handle, but if you were really keen you could probably just cut off the ring-end and mount your little cutting spanner in a handle to give you a bit more to hang on to.

Wall Rack


I made a wall rack for my jo and bokken from a length of kwila decking.

Tuesday, October 1, 2024

Jo and Bokken


Today I've been tarting up my jo and bokken.

I've ebonised the oak, and inset a couple of mostly decorative buttons in the hilt of the bokken — they also give me some tactile feedback about where my thumbs should be for a proper grip.

I don't use them much these days due to some issues with my shoulders, but I still like to keep them around.

Friday, September 27, 2024

Dynamic Sphere


There's a book called Dynamic Sphere of Aikido, or something like that, published quite a while ago now, that is illustrated with a whole lot of little brush drawings. I made a copy of one of them about 1990, and now I've made a linocut of that copy.

The paper is A6, cut down from a sheet of cartridge paper.

I wanted to make a print of this image because I thought it would be well suited to a linocut rendition, which it is. But at this particular moment, I mainly wanted to experiment with a way of transferring the image to the block by gluing a laser print to it with acrylic varnish, face down, and then wetting the paper and rubbing it away with a finger, leaving just the toner on the block. It works well, and I'll use the technique again, though I'll try printing on to a light tissue paper rather than ordinary printer paper – I think it will rub away more effectively.

I have used this image transfer method once before, but I haven't yet done any experimentation with ways to optimise the process.


Later...

Here's me using my finger to rub away at some tissue that I printed some stuff on. As I suspected, it's much easier than using printer paper, and leaves me a much cleaner image to work to.


You do have to take care that you don't get too enthusiastic, or else you start rubbing the toner off as well. Stop once you've got a clear image, and don't get hung up on removing every last fibre of the paper -- it won't matter at all when it comes to cutting.

I reprinted the image, reversed, to give me a guide to the areas that I need to draw back in after rubbing away too much.

This seems to me like the sort of process that just a little experience would make better.


Later still...

Here's everything composited together, though printed somewhat imperfectly.

I used a paper mask to roll up the various bits of the text block in two separate colours without getting ink everywhere.

I found the tagline text very difficult to ink up consistently, being such a long, narrow isolated area. The roller kept falling out of true, one way or the other.

I think I will probably cut up the text/logo/calligraphy block and use the individual elements separately. That will make them more flexible in use, and it's not as if precise placement is all that important for an image like this.

Wednesday, September 25, 2024

Dali Deco Woman


Here's another test print for a linocut.

This one is based on a bronze by Salvador Dali called Art Deco Woman. I don't know how big the original was.

The print is 95 x 245 mm.

It needs more work. I'm happy enough with the key block, but the ochre overlay is fairly imprecisely registered, and I'm going to have to open out some of the specular highlights to make them more definite.

It doesn't help that my yellow ochre ink has separated a bit in the tube, so it makes a very liquid film when rolled out that tends to fill in any fine lines.

Apart from that, it's okay I think.


Later on...

I decanted the yellow ochre ink into a little plastic jar and stirred the bejeezus out of it before rolling it out.

Then I printed the ochre block first, and the black second. It gave me a much cleaner, richer print.

I'm not enthralled with the blue overlay on the DALI text. In fact I might just cut the text off the block completely. I will cogitate on the matter.

Monday, September 23, 2024

Dot-Making Tool


I made this tool, used for making dots in a linocut, from a scrap of oak, a bamboo collar, and a 60mm nail. I don't know what its official name is; I just call it a dot maker.

The blade has a flat top, and a pair of angled facets underneath, creating a three-sided spear-point. Fortunately, the grinding doesn't have to be micron-exact, so I just did it by eye. I guess that if you were more worried about accuracy, it wouldn't be difficult to set up a grinding jig.

You just dig it into the surface of the lino and flick out a divot. There is a certain amount of control possible over the size of the resulting dot, but it's not an especially precise tool.

Sunday, September 22, 2024

Hwahong Gouges


I recently found these tiny woodcut/linocut gouges by a Korean company called Hwahong. I got them from Gordon Harris in Christchurch. They're not the cheapest gouges available, but they are far from being the most expensive: they cost about $14 each.

The steel is good, and the blades are long enough that the handles don't interfere with the cutting, but not so long as to be uncontrollable.

I have to wear high-magnification spectacles when sharpening them, because the blades are so small that they're difficult to see for those such as I with decrepit ocular organs. On a related note, I've had to paint coloured blobs on the ends of the handles so that I can easily distinguish them from each other.

The red blob is a very small V-gouge, the blue is a slightly larger V, and the green is a tiny U.

I realised after taking this photo that I should have turned them the other way up. First, because the maker's mark is on the other side, but also to show where I've carved away a pad for my forefinger to rest on while I'm cutting. It's not absolutely necessary, but it does give me immediate tactile feedback on the orientation of the blade.

Saturday, September 21, 2024

Laughing Man


My first proper marmoleum print, and I think I can safely say that I love this stuff. It allows for fine lines and stippling that I haven't been able to achieve in any other relief medium.

The image area is 97 x 134 mm. Ink is Flint water-based relief ink, and the paper is a hot-press Fabriano, though I don't know specifically which variety — it's about 350gsm I think.

Friday, September 20, 2024

Marmoleum


Thanks to my friend Jeremy, I now have a stack of Marmoleum blocks to make prints from. I've been trying to lay my hands on some offcuts for ages, to try it out, but could only find people who would sell it to me off the roll for an arm and a leg.

I've cut down the piece that he gave me into nine each of A3-ish and A5-ish, about 20 at A4, and a miscellany of odd sizes cut off the edges. That will keep me going for a while.

Marmoleum is a brand name for a commercial linoleum flooring, but it's harder and more robust than the lino available at retail for printmaking. Chris Pig speculates that it might have marble dust in the mix because of the name.

It is fairly expensive as flooring — when I sourced it off the roll, they quoted me about $165 per linear metre, with a minimum of two metres plus $65 to ship it down to me in Christchurch. Let's call it $400-ish for a batch. However, the pile in this photo is less than a metre off the roll, and the nine A3 blocks alone would cost me near enough to $500 from the arts supply shops in town. So, if you have the cash up front, or can put together a consortium to spread the cost, it works out much, much cheaper than buying so-called printmakers' lino. And it's much better.

I did a very quick little block, just to see how it cuts and prints, and it cuts like a dream.


It is a lot stiffer and more robust than the printmakers' lino, but it has a smooth, creamy texture, and cuts very easily and smoothly.

It will still break off small unsupported bits if you attack it too vigorously, so you do still need to take reasonable care with cutting fine detail.

I have not yet tried cutting very fine detail with a knife; that's still in the future. However, I have seen Chris Pig working the surface of a marmoleum block with a wood-engraving multiple tool, which indicates to me that it will take very fine detail.


It prints well too, though the blocks do require a bit of preparation before you start using them (see below).

This test print is a bit blotchy, but to be fair I wasn't taking quite the care I should have about inking up, paper quality, felt quality, and all the other bajillion variables that go into making a relief print.

Plus, making a virtue of necessity, I quite like the unevenness of the ink coverage, as long as it's not too egregious. If I want perfectly smooth fields of colour, there are better sorts of printmaking for that end. Screen printing, for example.

This image should display on your screen at about 100% of the print size, but of course that will depend on your own screen resolution.

The surface accepts the ink pretty well. This is just Flint water-based ink, so nothing very special. I don't have any oil-based inks, as I don't really have the facilities for easy clean-up, so I don't know how it reacts with them. I suspect they'd be better.

Block Preparation

Block preparation is very straightforward.


Like any lino, Marmoleum straight off the roll has a slightly uneven, polished texture to its surface, and that needs to be removed or else it will print a whole lot of white speckles. It flattens out very quickly and easily with a wet-&-dry sponge block, used wet. I have two of them, a reasonably fine "all-purpose" sanding block, and a fine finishing block, but the fine block isn't really necessary for this. Sand the surface until you've raised a decent slurry, and be sure to cover every inch of the surface.

One caveat: the back of the marmoleum is reinforced with an open-weave jute or hessian mesh, and if it gets wet, it shrinks and deforms the block. It pays, therefore, to keep the back dry as much as possible while scrubbing down the top surface.

I sanded down the feather block (above) against the side of our laundry hand basin, so that any water fell away and into the sink rather than creeping around behind the marmoleum. That seemed to work pretty well, but I was also being a bit careful to limit the amount of water I was using — just enough to keep the surface liquid.

Possibly you could seal the back with shellac or an oil- or spirit-based polyurethane before sanding; I haven't tried that yet.

After sanding, wipe the surface down clean, removing as much of the sanding slurry as you can, and then degrease the surface by wiping it down with liberal amounts of meths.

Once the surface was flattened, I painted it with a diluted black acrylic ink. This darkens it, and makes it much easier to see where you've cut into the surface. It doesn't need to be very dark, just darker than the natural colour of the marmoleum. In fact if it is too dark, it will make it more difficult to transfer an image on to the block for cutting. You'll just have to experiment to get the ideal dilution.

Once all this is done, you're ready to get an image on to the block by any of the usual methods (spirit or graphite transfer, gridding etc.) and start cutting.

It cuts easily enough that you could use those awful red-handled linocutting gouges with the interchangeable blades they use in schools, but honestly, get yourself some decent gouges. You won't regret it.

Later...


This is a state print, taken part way through the cutting process to give me an accurate idea of how the cutting is going, and where I might need to cut more.

Unfortunately there's not a lot I can do about the areas where I should have cut less.

The ink has reactivated the marker I used to draw the grid and sketch in the image, and the pressure of the press has transferred it along with the ink. Hopefully, when the ink dries on the block, it will seal it and prevent this happening again.

Tuesday, September 17, 2024

Pen Finish Experimentation


Experimenting with various finishes on my red beech pens. They are, from top to bottom:

  1. Walnut spirit stain and linseed oil
  2. Iron acetate ebonizing with linseed oil
  3. Shellac
  4. Oil and beeswax

Of the four, shellac is the most time-consuming, as it needs at least three coats, with a rub-down between each with 320 grit.

Monday, September 16, 2024

Another pen


This pen, 190mm long, I did in red beech, with no finish except for some oil and beeswax. It's a pretty boring timber with the sole virtue that it's pretty easy to work.

The nib is held in place with a bamboo plug fixed by friction alone, and though it would be theoretically possible to swap nibs, effectively it's a permanent fixture.

Friday, September 13, 2024

Coat Hangers


Today I have increased our coat-hanging capabilities.

The hangers themselves are matai, the baseboard is rimu, and the mushrooms that hide the mounting screws are oak.

I suppose I could have just gone down to Bunnings and bought some metal coat hooks, but where's the fun in that?

Thursday, September 12, 2024

Salt Scoop


I was watching Richard Raffan on Youtube, and he was demonstrating how he makes his little scoops. It struck me that it would be a good way of using up little teensy scraps of nice timber, so I thought I'd give it a go.

This one is in matai (I think), and is very small — only 65mm long, and 17mm in diameter. I oiled it with rice bran oil, so it's food-safe.

One thing I learned from this is not to be too stingy about the waste, and to give it a decent bite in the chuck. This one I knocked off its axis and had to try to reseat, and though I got it turning mostly true, it was never really the same again.

Also, if I was to do these on a regular basis, I would definitely have to make myself a custom small bowl scraper for carving out the bowl. I bodged up this one using my swan-neck carbide scraper, because it was the only tool I had with a small enough cutting edge to get in there. It worked, but it was not ideal for the task.

Monday, September 9, 2024

Finial Madness


I've been turning these finials lately, just for something to do.

They are, from left to right:

  • Beech (broom handle), 25mm diameter
  • Kowhai, 18mm diameter
  • Oak, 10mm diameter
  • Beech, 8mm diameter

I started with the kowhai, when I pulled an old dead dry branch off a tree alongside our driveway the other day. Then on to the others to try out this or that — the most recent being the tiny one on the right, today, to try out a new set of 8mm chuck jaws that just arrived.

I have no immediate use for finials of any size, but they're a quick and useful test bed for trying things out. Something that has become especially apparent with the tinier ones is that I need better eyes, and possibly smaller tools as well.

Thursday, September 5, 2024

Lathe Collets


My smallest lathe chuck will only go down to a diameter of about 12 mm, which is mostly fine, but on occasion I want to turn something a bit teensier.

So I made a set of collets in Blender and 3d printed them.

With this set I can get down to about 7.5 or 7 mm, but if I need to go any smaller than that I can whip up another collet in about quarter of an hour.


Because they're being used for very small pieces, they don't have to endure much in the way of working pressure. Which is good, because though PLA filament is fairly tough for plastic, it is still just plastic.

I did once buy a set of jaws from AliExpress that would go down to about 6 mm, but it turned out once they arrived that not only would they not fit on the chuck they said they would, they wouldn't fit on any of the other chucks I had either. They'd need some attention from a machinist to make them fit, and I don't have those skills or that equipment. Fortunately, they were fairly cheap, so I didn't lose much by it. But it still pissed me off.

Teensy Kowhai Finial


I pulled a dry dead branch off the kowhai that grows alongside our driveway this morning; it didn't so much break off as exploded into fragments. I turned this little finial from one of its sticks. It's about 80mm long, so not very big.

The kowhai turned well enough in general, but it is very brittle, and it chipped out badly around the collar of the piece. Also, it has an odd colour seam running up it — I'd normally assume that it was a heart-sap differentiation, but it runs across the grain, so it beats me what causes it.

It's not an unattractive timber (apart from the bug holes) but its brittleness would severely limit its usefulness.

Sunday, August 25, 2024

Trumpety-Thing Base


Quite a few years ago, we found a pair of trumpet-like brass things in some antique-junk shop.

I assume they're supposed to be vases or something. We have no idea of where they came from, nor how old they are. Both of them are somewhat damaged, but neither beyond the bounds of displayability.

Both of them were missing their original bases, so today I turned one. I think it's matai. I'll get around to the other one, one of these days.


Next day...

Well, one of these days turned out to be this day.

The other piece of matai (?) I had turned out to be full of splits and a nail, so, bugger.

I therefore turned the second plinth in white oak, and ebonized it with iron acetate.

The piece was only 40mm thick compared with the matai's 50mm, so I did the oak one in two pieces (with a 10mm base plate to bring it up to 50mm) and glued and screwed them together.

It doesn't bother me in the least that they're not identical, so that's good.