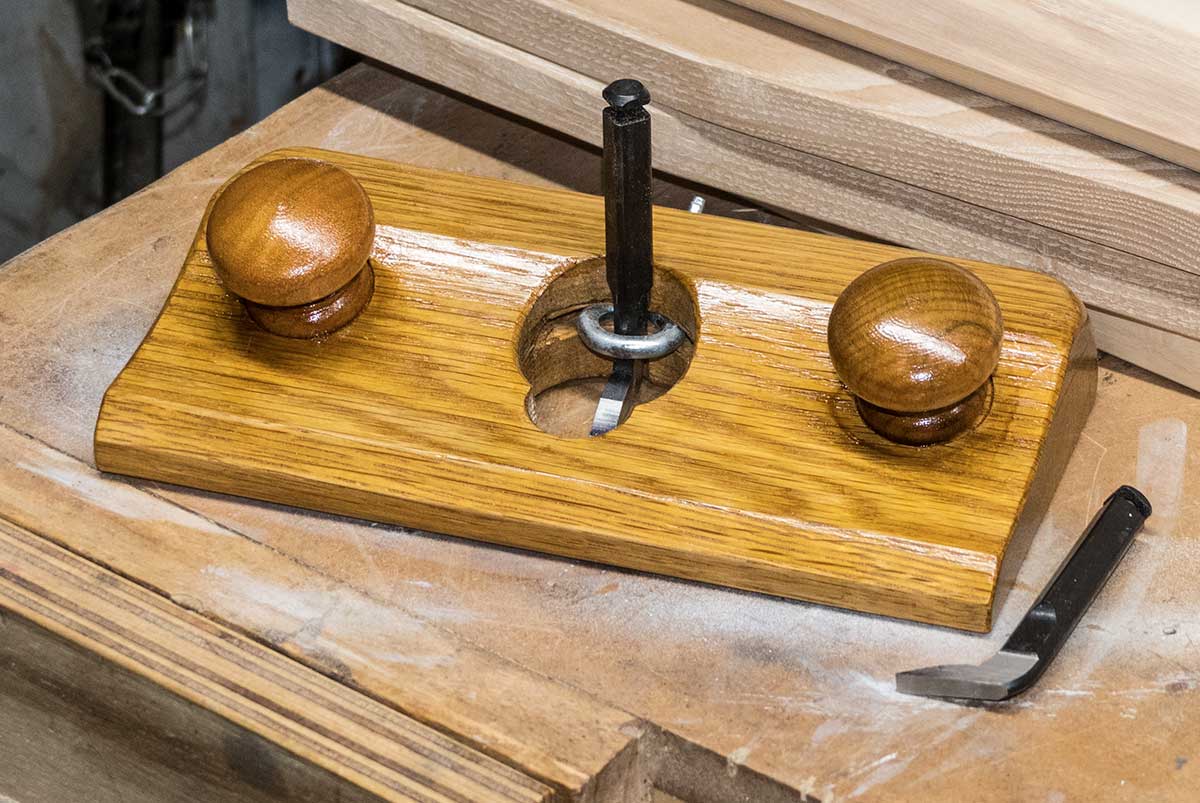
Tuesday, November 28, 2017

Mitre Saw Wheely-Stand Thing

I've had my mitre saw clamped to a folding workbench thingy (basically a cheaper version of the Black & Decker Workmate) for years. That was fine, but it was troublesome to shift around, and in my rather cramped little workshop I need to be able to shift things around so that they don't interfere with each other when I'm trying to use them.

So, I made this stand out of el-cheapo treated framing timber and some unexpectedly expensive locking castors. It doesn't look like much, but it's sold as a rock, and it gave me lots of practice at cutting mortice & tenon joints, bridle joints and lap joints.

We have bamboo growing in our garden, and I thought I'd use some as railings for the upper shelf, to stop things being pushed out the back or falling out the sides. Bamboo is good for that sort of use, as it's both thin and strong, and it will get stronger as it seasons. The down-side to it is that nature is distressingly imprecise in its sizing, and I had to do quite a bit of searching to get canes that were all within a size range that would fit my available drill holes.

As a side-effect of all this, I got my clamps a bit more organised and accessible. Next, I'll have to get a concrete pad under where the saw usually stands — at the moment it's sitting on various bits of wood spanning the rotten boards underneath, which isn't ideal.

Wednesday, November 22, 2017

What I Did Today

This afternoon I shifted a whole lot of wood and crap so I could shift some drawers so I could shift some bins so I could shift my mitre saw so I could shift those drawers again so I can use my table saw without banging bits of wood into things.

For a brief moment I marvelled at the unexpected amount of space I had.

Then I shifted all the wood back in again, which filled up most of that free space, and I realised that most of it is just rubbish so I'll have to go through it and start chucking most of it into the firewood pile.

And that's what I did today. Now I'm drinking cold beer, which is better.

(At some point I'm going to have to lay some more concrete so I can shift a workbench so I can shift my bandsaw to a more usable position, but not just yet. Not just yet.)

Monday, November 20, 2017

Yet Another Stool

I made another stool, this time out of some fairly dodgy, knotty white oak off-cuts. I had to work hard to get some decent lengths out of them, but persistence paid off in the end.

Our stool supply is outstripping the number of bums available to sit on them in normal daily life, but they'll come in handy for perching guests on.

I made many, many mistakes in building this. Perhaps I may learn from them, but who knows?

Tuesday, November 14, 2017

Vroom Vroom

Ball point pen, about 150mm wide

Stool Sample

I had a macrocarpa plank that was getting in the way, so I turned it into this stool.

For some reason it seems to me that it has a somewhat ecclesiastical feel, probably because of the scallops and what-not.

I like working with macrocarpa, but I can't say I'm especially fond of the knots. They tend to be dead knots too, so they fall out.

The stool is 600mm long by about 450mm high, a very comfortable sitting height for me. It's long enough for two people to sit on, as long as they're two very friendly people.

Tuesday, November 7, 2017

Router Plane Revisited

I went back to the oak router plane I made a while ago and added some handles. It worked OK without them, but they give me a bit more control and it's easier on the hands this way. They're just a pair of tawa drawer-pulls.

Because its depth adjustment is by tap-and-hope rather than by means of a screw thread, it's a bit tricky to use with the precision of my Stanley or Record routers, but nevertheless it's pretty smooth and easy to use once you get used to its little quirks.

I'm using Veritas cutters in it, and though they're excellent cutters, they've introduced a complication.

As you can see, the back of the cutter curves forward towards the sole — I'm not sure why, but probably just as a side-effect of the tool's production when they're bent into shape. Anyway, the effect of this is that if the cutter is set to too shallow a depth, when the eye-bolt is tightened, it engages over the curved section and cants the cutter forward, and the edge of the blade is suddenly much deeper than one might have expected.

I have a couple of ideas for ameliorating this issue.

The first is to add a sleeve, anchored to the top of the router, through which the shaft of the blade runs. That should help some, and it's the most straightforward solution, but it won't entirely eliminate the problem because it will have to be fractionally loose on the shaft to allow the cutter's depth to be adjusted at all, and any slack will still allow the cutter to cant forward ever so slightly when it comes under pressure from the eye-bolt.

The second is to cut out the existing eye-bolt housing entirely, and glue in a new block in which a new housing is cut that will engage higher on the shaft of the cutter. I'd say, for safety's sake, the eye-bolt really needs to be engaging at least 10 mm higher up the shaft of the blade. That's a pretty major bit of surgery, and it would probably be quicker and easier just to make a whole new tool, taking into account what I've learned from this one.

Next Day:

I added a collar to restrain the forward movement of the cutter when the eye-bolt is tightened, and it works well. It's made out of a 100mm (4") nail.

It looks a bit unsightly, I admit, but it does the job, and as an added bonus it ensures the cutter sets square to the cut. It can't be seen from this angle, but there's a vertical groove in the body of the router that ensures that the shaft is square vertically.

As I suspected, it doesn't eliminate the issue completely, as it has to be loose enough to allow the cutter shaft to move up and down, but the unwanted movement when the cutter is set shallow is now minimal, and much easier to compensate for.

Part Two
Part One